Getting Started
After you have successfully installed Maymyo, you start by adding your own application under Maymyo. Your application will be a sibling of Maymyo’s applications, ie infra, common or billing. You should use the services provided by Maymyo in your own application, eg use our Calendar when you need business day computations.
Please go through our Explore and understand Maymyo to learn how you may use these services.
Your Maymyo directory may look like this.
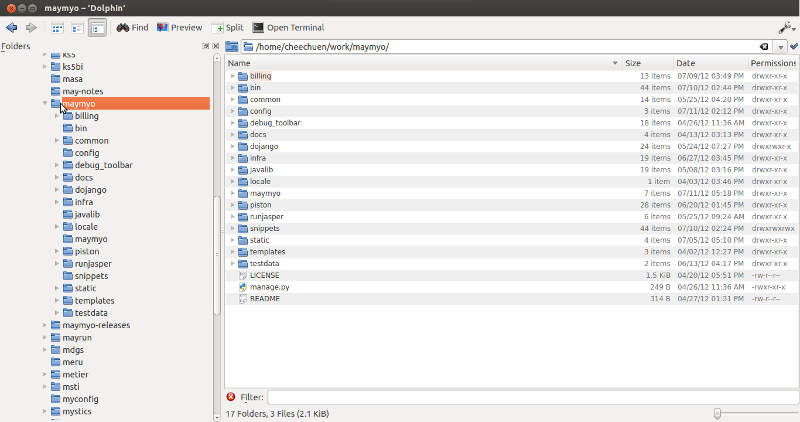
Directory layout of Maymyo
Open a terminal (or command prompt on Windows) and change to Maymyo home and type on the command line:
$ manage.py startapp myapp
Note
If you have problems running manage.py, make sure you are in Maymyo home and also ”.”, ie the current directory is in your PATH. Otherwise use ”./manage.py ...”.
This will create your application named “myapp” under the Maymyo home directory.
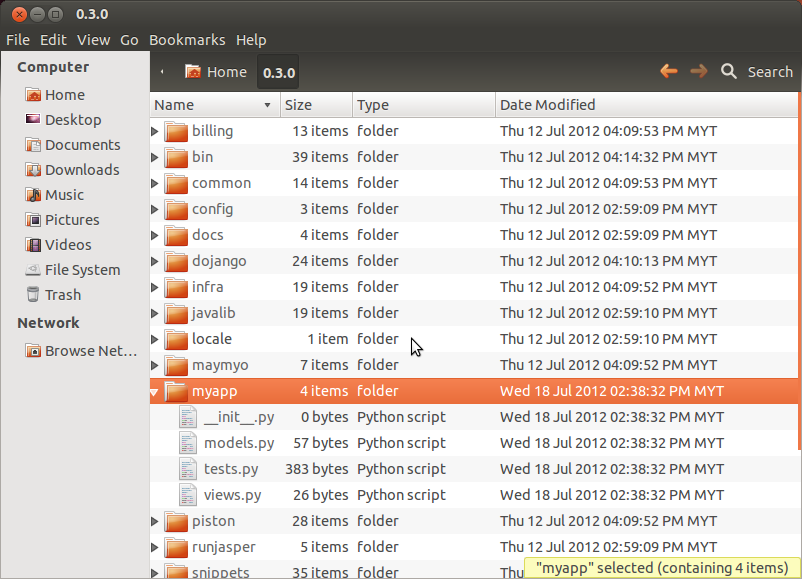
Directory layout of your new application
Then add your application to the maymyo/settings.py INSTALLED_APPS setting, right below our applications. Use your favorite text editor to edit the above settings.py. Find INSTALL_APPS and add the line ‘myapp’ like below:
INSTALLED_APPS = (
'django.contrib.auth',
'django.contrib.contenttypes',
'django.contrib.sessions',
'django.contrib.sites',
'django.contrib.messages',
'django.contrib.admin',
'django.contrib.staticfiles',
'django.contrib.humanize',
'dojango',                      # Dojango
'infra',                        # Our infrastructure app
'common',                       # Common Business Objects
'billing',                      # Billing Module
'myapp',                        # My new app!
)
If your application is small, ie just a few models, then you can leave the directory structure and files as is. Otherwise, we suggest that you create module directories for
- models
- forms
- admin
- views
under your myapp directory and create one file per model (and its children). Remove the original models.py and views.py. forms and admin directories are our preferred way of organising our model forms and admin programs. This is better when you are using a source control application with a team of developers who will then not have conflicts accessing the same source file. Module directories means that they must have a special file named __init__.py to tell python that the directory is a module.
Start by creating your models (either in the models directory or models.py). You should inherit our RecordOwner model, which automatically adds some fields to keep track of who created and last updated a row (in database-speak or instance, in django-speak). The best way to do this is to open an existing Maymyo model (like infra.ValueSet) and use “Save As” to your own application’s models directory.
If you want your model MyModel to be audited (you should, it comes free), ie all adds, updates and deletes are tracked and is available as History, then import the following at the top of your my_model.py file:
from django.db.models.signals import pre_save, post_save, pre_delete
from infra.custom.audit_handlers import audit_update_handler, audit_add_handler, audit_delete_handler
and right after your model’s class definition, add:
# Register the audit update handler
pre_save.connect(audit_update_handler, sender=MyModel)
# Register the audit add handler
post_save.connect(audit_add_handler, sender=MyModel)
# Register the audit delete handler
pre_delete.connect(audit_delete_handler, sender=MyModel)
The above will register your model with the audit handlers to record all changes to your model done through Maymyo. If you write your own scripts to change your model, we will still audit the changes but since we have no knowledge of who did it, nobody will be assumed to be the user. However, if your scripts are run by our Task Queue, we will know who the user is.
Now you can go ahead to program your Django application using your Model (remember, you are an experienced Django developer). As a matter of convention, we prefer to name our forms and admin files using our model’s name. Your program can be a Django admin program, a transactional program using views, forms and templates or a report using the TextEngine or JasperEngine reporting engines. You can also build rest servers for your models using piston, please see our infra/api directory for some examples.
To develop new admin programs for your models, please copy our existing admin programs. You need to create a form for your model under your forms directory. Please copy our infra/forms/value_set.py and use “Save As” to your own forms directory. Then copy our infra/admin/value_set.py and use “Save As” to your own admin directory.
As you would have noted, you register your model and admin class with our infra_admin site. This makes your admin program available under the relative url “infra_admin/myapp/yourmodel/”, where yourmodel is the name of your model.
You need to edit the maymyo/urls.py file. This should be in maymyo_home/maymyo. Add the line “from myapp.admin import *” at the top of this file, at about line 17, right after our own bundled applications (ie infra, common, billing...):
# Our own admin site
from infra.custom.infra_admin_site import infra_admin_site
# Import for all apps, its admin programs so that they can register themselves with our site.
# Please add your own apps under ours.
from infra.admin import *
from common.admin import *
from billing.admin import *
from myapp.admin import *
If you have problems importing myapp.admin, it may be because you did not create __init__.py file in the admin directory.
Setting up your application’s URLs for your views
You should be familiar with editing urls.py to map urls to your views. Add a new urls.py to your myapp directory. Copy our infra/urls.py and remove (or comment out) lines as necessary. Then include your myapp‘s urls in maymyo/urls.py by adding:
# Please include your own app's urls below this line....
(r'^myapp/', include('myapp.urls')),
This should be added to the urlpatterns tuple.
Accessing your new program from the Dashboard
Once you have completed a program or report and are ready to publish it to your users, you need to add an AppProgram (or AppReport) instance to Maymyo. You can do this either by using our “Maintain Infrastructure Master Files” menu’s “Maintain Application Programs” or permanently by adding it to your fixtures directory. The latter is more complicated, for now, we point you to our own common/fixtures/menu_item.py and common/fixtures/app_program.py to copy and modify.
Assuming you have a new admin program for your MyModel. Its relative url should be “/infra_admin/myapp/mymodel/”. Login as “admin” and click on “Maintain Infrastructure Master Files” and expand the “Application Executables” sub-tree.
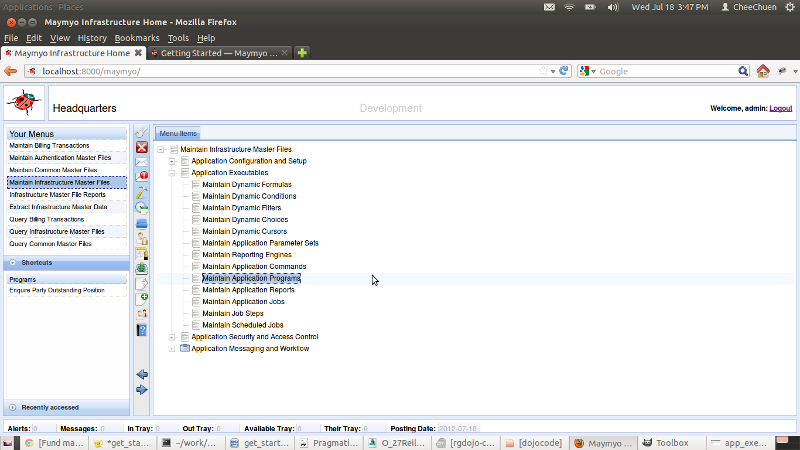
Application Executables Menu Items
Select “Maintain Application Programs” and click on the “Add Application Program” button on the top right. Add your new program as below.
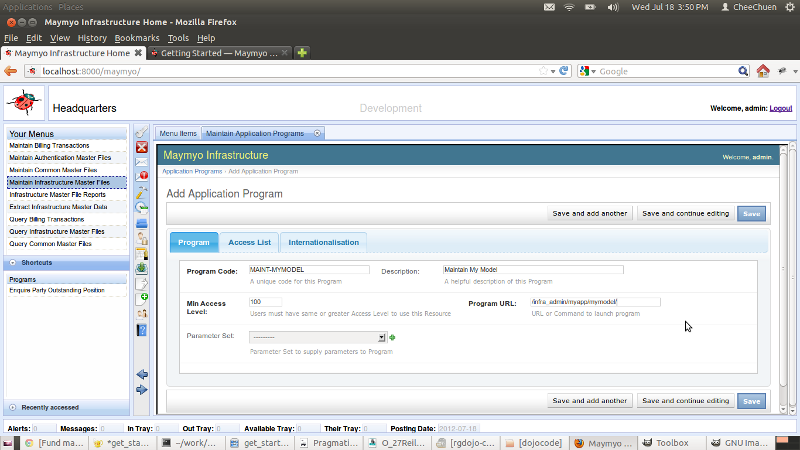
Adding your new program
- each program must have a unique Program Code. By convention, we prepend admin programs with “MAINT-”.
- leave the Minimum Access Level at 100. This controls which users can access this program. See Application Security and Access Control for more information.
- The program URL is relative to the host portion of your URL.
- Click “Save” to add your new program.
Creating a Menu for your programs
The next thing you need to do is to create a new Menu (or add your program to an existing Menu). Your application should have its own module menu under our “Application Main Menu”. Under your module menu, you should typically have menus for :-
- Maintain myapp Master Files - for your admin programs
- Query myapp Master Files - your admin programs in query mode. If you inherit from our VersionModelAdmin, you can create a new query program by appending “query/” to any existing admin program url.
- myapp Transactions
- myapp Enquiries
- myapp Reports
In “Maintain Infrastructure Master Files”, expand on the “Application Security and Access Control” sub-tree.

Application Security and Access Control menu
Select the “Maintain Application Menus” option. Then click on the “Add Application Menu” button.
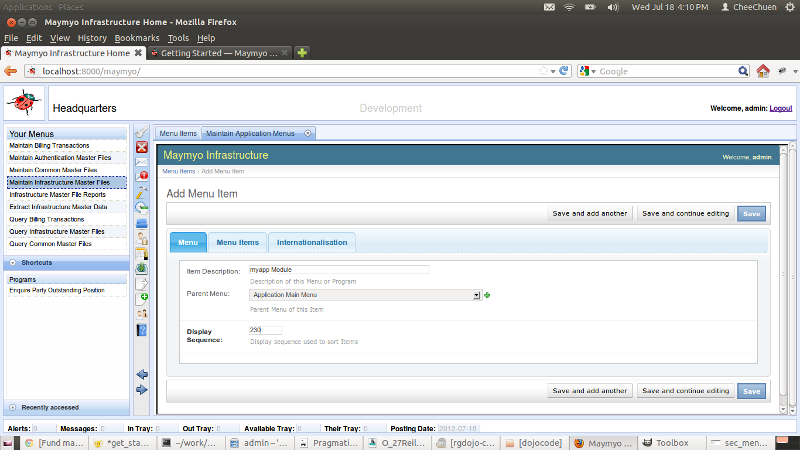
Adding a new menu
Your module menu should use “Application Main Menu” as its parent. The “Display Sequence” field is for its ordering under the parent menu. To find out the next sequence, display the “Menu Items” tab for the parent menu. Simply add 10 to the last sequence you see.
Then add the list of menus as suggested above under your new Module menu. Your admin programs should be added under the “Menu Items” tab of your “Maintain myapp Master File” using the “Resource” drop-down list.
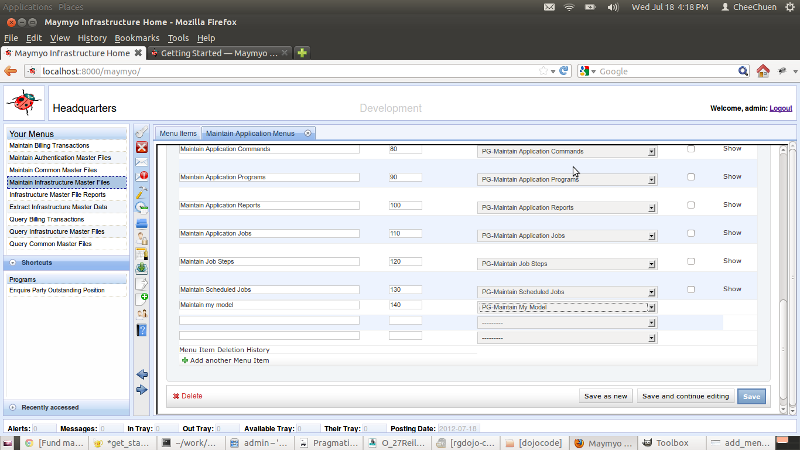
Adding a new menu item
Allowing access to your menu to a User
Finally, you should allow selected users access to your menus. You may either add your menu to a Security Profile or User Profile’s acccessible menus. The latter will override the former.
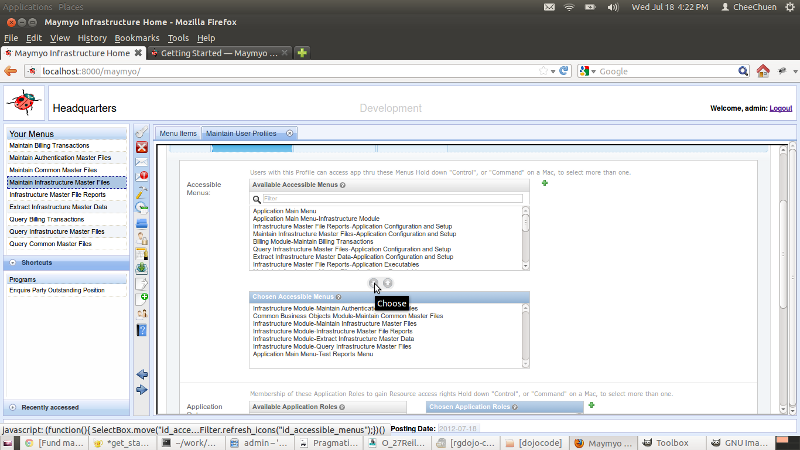
Adding a menu to a Security or User Profile
Click a menu in the “Available Accessible Menus” combo-box and click the down-arrow icon to allow the menu to be accessed. You should see your menu added to the “Chosen Accessible Menus” combo-box.
You can try adding your menu to a specific user and then login as that user. Your menu should appear in her Dashboard.